
a beginner’s guide to an easy, thrifty backyard garden
Your social media keeps flaunting pictures of stunning vegetable gardens! Victory Gardens as some of your friends called them when the pandemic started and everyone rushed to hoard seeds and baby chicks.
Does the idea of growing your own vegetables, fruits, and herbs excite you? For a very small upfront investment of time and money, you too may join the elite ranks of those who enjoy the amazing rewards of fresh food from their own yards.
You truly can save money and enhance your life with even a small garden. Of course, gardening is also a perfect addition to any homeschool curriculum!
easy gardening tips on a budget
Here are my top 7 ways to get started without breaking the bank. Get ready to jump in!
If you follow my money-saving tips, you will know that saving money for me does NOT always entail buying the cheapest. Sometimes saving money happens by investing in an item that will last long enough to offset its slightly higher cost. In gardening, I do both. For some things, I will suggest the least expensive, and for others, we will invest in long-range savings.
1. create garden beds
The first question is always: Why garden beds? In order to keep a garden neat and contained, many backyard gardeners prefer the ease and the ascetic of garden beds over designated garden plots. This is an area where I see gardeners spend hundreds, even thousands of dollars. My very thrifty garden bed secret?
fence boards
Fence Boards. And not just any fence boards, get the untreated seconds. Seconds are the ones that are not perfect. Sometimes they have odd knot holes or they might be cut slightly off. I have had the best results with ¾” thick boards. The ½” boards are too weak to last. Even with the outrageous prices of lumber right now, my 18” deep garden beds would cost me $40.00 each or if I reduced them to only 12” deep, I could make one bed for about $25. Each side is three 6” high pine fence boards. I started with a pile of 6’ boards and cut two feet off six of them.
My beds are therefore 6’x4’ the perfect size for me to be able to reach every part of the bed for planting, weeding, and harvesting. I chose 2”x2” to use for my corner anchors due to cost. If you are willing to spend a bit more, a 2”x4” or even a 4”x4” would serve as a sturdier corner support.
How durable are fence boards? Mine have lasted nicely for nine years only needing a few repairs here and there. This year we did a major repair and replaced maybe one-sixth of the boards.
If you are resourceful and handy, there are myriad other materials that make serviceable garden beds as well. Watch for a separate article detailing the pros and cons of different materials like pallets, tires, bricks, cinder blocks, logs, railroad ties, milk jugs, and more.
2. prepare the soil
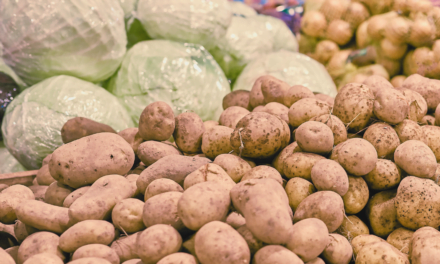
Soil is the area I choose to invest in for the long-range benefits. My suggestions for what to fill your garden boxes with are as follows: Soil, sand if needed to loosen the soil, compost, and peat moss. There are many other things you could add but this is an article, not a book, so I will keep it simple. If you are building only one or two boxes then one of the cheapest ways to buy compost, if you have not created it yourself, is to go to your local gardening or box store and ask what they do with the ripped bags of compost or soil. Many will sell them to you inexpensively.
pro tip: lay a tarp in your vehicle to avoid dirt spreading everywhere
If you are building more than two boxes, having a load of compost delivered by a local landscape company is likely the best way to go. If you have a pickup truck and can get it yourself that’s great, but I have found buying it in bulk is usually cheaper–and they can often mix it for you with a good proportion of soil and compost.
Peat Moss is controversial because it is a finite resource. It is wonderful at keeping the soil from compacting and holding water so it doesn’t just filter through your bed. It is an investment. I chose to buy one large (3 cubic foot) bag for every three garden beds. After filling the bed with my compost/soil mix, I add the peat moss and stir it into the top 6 inches or so of each bed. I believe my water savings has offset the original cost of the peat moss.

3. select plants and seeds
Buying plants will cost more than starting with seeds. If you have the ability and the time and space to start your own seedlings indoors a few weeks prior to your local frost-free date, you will realize the greatest savings. You may even find that you have extras and can either sell or gift them to friends and neighbors. If you live in an area with a limited growing season, starting with plants will dramatically increase your yields each year.
If you prefer to start with plants and are unable to grow them yourself there are more budget-friendly sources. Search your neighborhood or local sales sites for gardeners with extras. You are likely to find many cheaper or even free plants to fill your garden. If you are not particular about varieties this is often the way to go. It is also a great way to connect with and learn from gardeners in your particular region.
Usually a bit more expensive than neighbors but less than the gardening store would be a farmer’s market or a co-op. There are many co-ops and farmer’s markets; Google to find one in your region.
Once you get your garden going you may want to learn how to save seeds from your own plants for the following year for even greater savings. It is such a satisfying feeling to plant seeds that you collected and saved from your own harvest.
Saving Note: Seeds and vegetable plant starts can be purchased with EBT (or food stamp) benefits.
4. picking tools for gardening
There are a few very useful tools for the backyard gardener to own but again, it is not necessary to rush right out and break the bank. Used tools work great. Estate sales are my favorite source of good gardening tools for less. Minimally I suggest a sturdy shovel, a good garden rake, a hand trowel and a small pair of pruning shears or scissors. One additional item that makes my life easier is my digging fork. I expect after your first year as a backyard gardener you will be hooked. Take your time and add to your used tool collection over the coming years.
5. when and how to water your garden
You can’t have a garden without water. This can also be the greatest expense in some areas. Here are my tips for saving money on water: Collect rainwater to be used for your garden. Water twice a day early and late, not when the sun is shining directly on the garden and evaporating everything before it has a chance to reach the plant’s roots. Use a timer so that you don’t accidentally over or under water.
Put peat moss into each of your garden beds. Add mulch to the surface of your garden. This helps hold moisture and cuts down on weeds. A drip system is much more efficient than overhead watering, but it is also time-consuming and costly to install. If you decide, after your first year, that this is a long-term hobby, it is worthwhile to invest in a watering system for your garden.

6. use free or cheap mulch
Ground cover or path cover! Mulching can save you on weeding and watering. Here are some free or cheap ground covers: Cardboard boxes, broken down and laid on your garden paths. Grass clippings. Weeds, yep –pull them out, stack them on the garden paths, and let them dry. Carpet scraps. Or really anything that will prevent weed growth. Buried under my bee garden area is a giant hamburger advertisement, recycled from a billboard. In the actual garden beds, you may mulch with grass clippings, newspaper, black plastic, landscaping fabric, or straw.
7. create a compost pile
Compost is free and easy. You need a location and a system. Many communities offer free compost classes every April in celebration of Earth Day and each participant leaves with my favorite kind of compost bin: FREE. Pallets work nicely to organize and contain the decaying piles, or you can literally just make piles.
The keys to good healthy compost are: make sure it can get air, turn it regularly, add water, and mix both green and brown matter in each compost pile. By having your own compost you save money on waste by throwing out less. You save by having to buy less compost. Making it is free. You save by adding nutrients right back into your own soil rather than having to replenish the soil more frequently. I find having a compost pile to be very satisfying.
put these gardening tips into practice
It does not require a major investment to start and maintain your own garden. Even the more costly additions that many people choose to add to a backyard garden can be done within a reasonable budget, still allowing your garden to produce more benefit for your family than it costs. Some years I spend a bit more than others. In 2021, I did not get my own plants started indoors, so I spent about $110 at a co-op on plant starts. I save my own seeds from year to year so this should be my only out-of-pocket expense besides water costs.
We will eat hundreds of pounds of produce from this garden. I will can salsa and pickles as well as store squash, onions, and tomatoes to last through much of the winter. I might even add a few pics to my own social media and flaunt my greens! Of course, only to inspire a newbie to get started with a vegetable/fruit/herb garden. Come join our not-so-elite gardener ranks and enjoy the amazing rewards of fresh food from your own yard!
Still have questions on getting started? Pop your question in the comments below, and I’ll personally reach out to help.
Looking for more ways to help the family budget? You’ll love our 30 Days of Dinners budget meal plan and 25 Proven Strategies for Building an Emergency Fund.
